
Table of Contents
Introduction
In recent years, the concept of a Food Forest has gained popularity among gardeners, permaculture enthusiasts, and sustainability advocates. A food forest is a self-sustaining, layered ecosystem designed to mimic the structure of a natural forest while producing an abundance of edible plants. By integrating diverse plant species that work together harmoniously, food forests create a thriving environment that supports both human needs and the surrounding ecosystem. Discover how you can turn your backyard into a thriving business by leveraging sustainable gardening practices.
This enhanced guide aims to simplify the process of creating a food forest, making it accessible to beginners while addressing regional variations, providing visual aids, and considering cost factors. Additionally, it includes personal anecdotes and success stories to inspire readers. Whether you’re an experienced gardener or a novice, this step-by-step guide will help you design and cultivate a thriving food forest tailored to your specific environment.
1. What is a Food Forest?
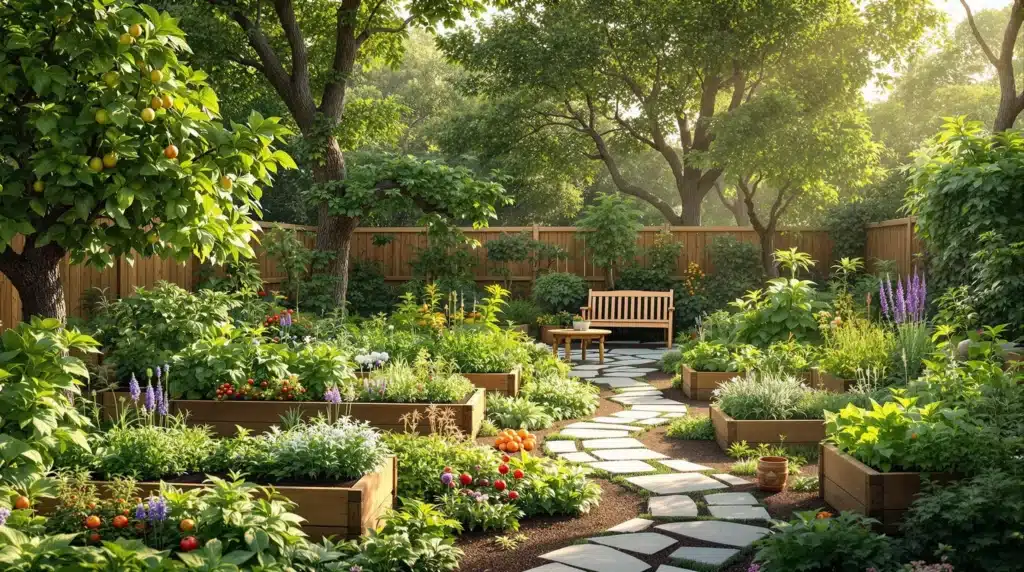
A Food Forest is a carefully designed, self-sustaining garden that mimics the structure and function of a natural forest while producing a diverse array of edible plants. Unlike traditional gardens, which often focus on a single layer of crops, food forests are built around the concept of multiple layers, each serving a specific role in the ecosystem. These layers work together to create a balanced, productive, and resilient system that requires minimal human intervention once established.
At its core, a food forest is modeled after the natural dynamics of a forest, which is one of the most efficient and self-sustaining ecosystems on Earth. It incorporates seven key layers:
- Canopy Layer: Tall, fruit- or nut-bearing trees that provide shade and structure.
- Understory Layer: Smaller trees or dwarf varieties that thrive in partial shade.
- Shrub Layer: Berry bushes and other mid-sized plants that fill the space between trees.
- Herbaceous Layer: Herbs, vegetables, and flowers that grow close to the ground.
- Ground Cover Layer: Low-growing plants that protect the soil and suppress weeds.
- Root Layer: Underground crops like tubers and root vegetables.
- Climbers/Vines: Plants that grow vertically, using trees or structures for support.
By replicating these layers, a food forest maximizes the use of vertical and horizontal space, creating a dense and productive system that supports a wide variety of plants, animals, and microorganisms.
One of the defining features of a food forest is its self-sustaining nature. Once established, it requires minimal maintenance compared to conventional gardens. The plants in a food forest are chosen and arranged to complement one another, creating a system where nutrients are recycled, pests are naturally controlled, and water is conserved. For example, nitrogen-fixing plants enrich the soil, while ground covers reduce evaporation and erosion. This interconnectedness allows the food forest to thrive with little human intervention.
The design and philosophy of food forests are deeply rooted in the principles of permaculture, a sustainable approach to agriculture that emphasizes working with nature rather than against it. Key permaculture principles that guide food forest design include:
- Observation and Imitation: Studying natural ecosystems and replicating their patterns and relationships.
- Diversity and Resilience: Incorporating a wide variety of plants to create a balanced and adaptable system.
- Organic and Sustainable Methods: Avoiding synthetic chemicals and relying on natural processes to maintain soil fertility, control pests, and manage water.
- Energy Efficiency: Designing systems that require minimal external inputs and make the most of available resources.
By embracing these principles, food forests not only provide a sustainable source of food but also contribute to the health of the environment. They embody the idea of working in harmony with nature, creating a regenerative system that benefits both people and the planet.
Step 1: Decide the Type of Food Forest You Want

Step 1: Define Your Goals and Understand Your Region
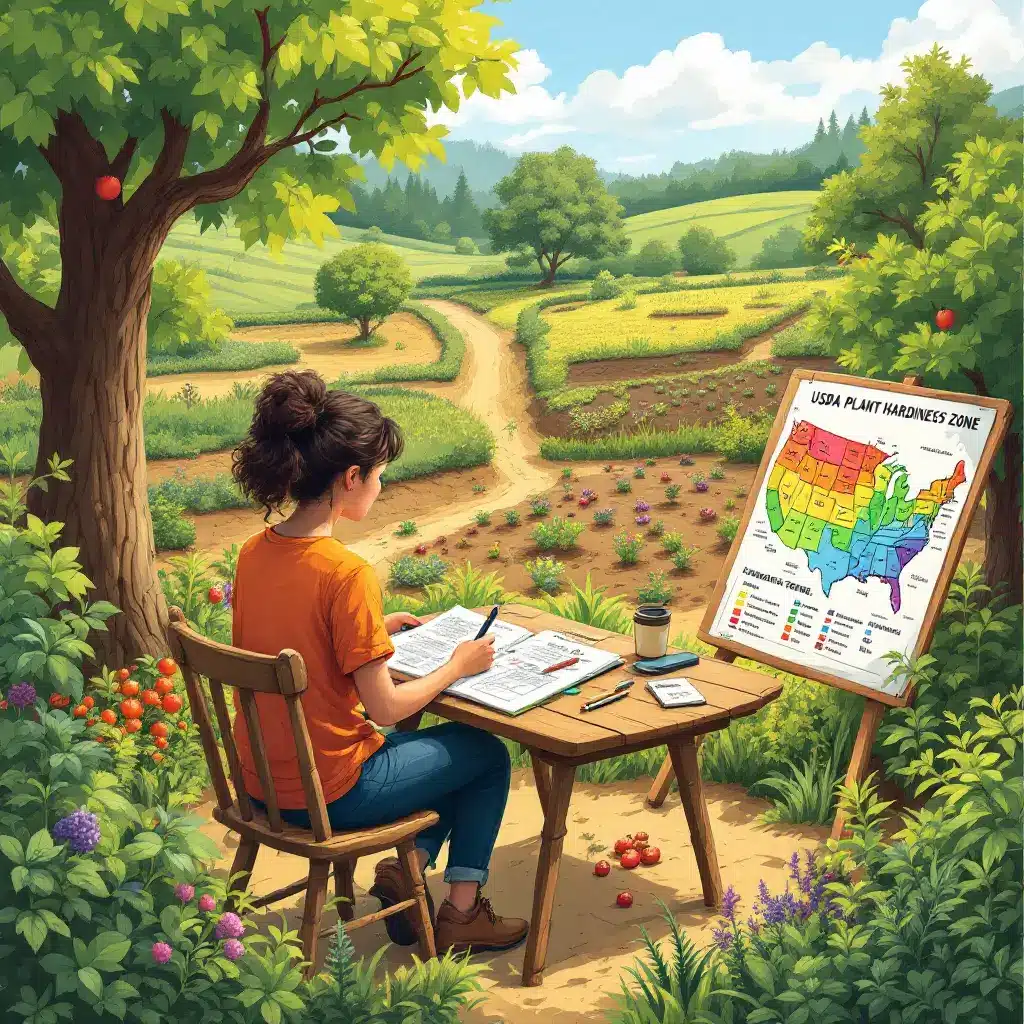
The first step in creating a food forest is to define your purpose and understand the unique characteristics of your region. This ensures that your food forest is not only productive but also well-suited to your local climate and soil conditions.
Purpose and Goals
Start by identifying your goals. Are you looking to grow fresh fruits and vegetables for your family? Do you want to cultivate medicinal plants, herbs, or pollinator-friendly species? Your goals will influence the types of plants you choose and how you design your food forest.
Regional Context
Understanding your region’s USDA Plant Hardiness Zone, climate, and soil type is crucial for building a successful food forest. The United States spans a wide range of climates, from arid deserts to temperate forests and tropical zones. Here are some examples of plants suited to different regions based on USDA zones:
- Zones 3–5 (Cold Climates):
In colder regions, focus on hardy plants that can withstand freezing temperatures. Examples include apples, pears, cherries, hazelnuts, and berry bushes like blueberries, raspberries, and currants. Cold-hardy herbs like mint, thyme, and chives also thrive in these zones. - Zones 6–8 (Temperate Climates):
These zones offer a moderate climate suitable for a wide variety of plants. Consider fruit trees like peaches, plums, and persimmons, as well as nut trees like pecans and chestnuts. Berry bushes, such as blackberries and elderberries, grow well here, along with herbs like oregano, sage, and rosemary. - Zones 9–11 (Warm and Tropical Climates):
In warmer regions, focus on heat-loving plants like citrus trees (oranges, lemons, and limes), avocados, figs, and pomegranates. Tropical plants like bananas, papayas, and guavas also thrive in these zones. Herbs like lemongrass, basil, and turmeric are excellent additions. - Arid and Semi-Arid Regions (e.g., Southwest):
For areas with limited water availability, prioritize drought-tolerant plants such as olives, figs, pomegranates, and native herbs like sage and lavender. Incorporate water-saving techniques like swales or drip irrigation to support your plants. - Coastal Regions:
Coastal areas often have sandy soils and high humidity. Plants like sea buckthorn, elderberries, and salt-tolerant herbs like rosemary and thyme are well-suited for these conditions. Fruit trees like figs and citrus also perform well in coastal climates.
Soil Considerations
Before planting your food forest, it’s important to understand your soil. Different plants grow better in different types of soil, so testing and observing your soil will help you choose the right plants. Here’s how to get started:
- Check Your Soil Type:
- Sandy Soil: Feels gritty and drains water quickly. Great for plants like lavender, rosemary, and other herbs that don’t need a lot of water.
- Clay Soil: Feels sticky and holds water well. Perfect for plants like comfrey, elderberries, and pawpaws that like moist conditions.
- Loamy Soil: Feels soft and crumbly, holding just the right amount of water. This is the best type of soil for most plants, including fruit trees, vegetables, and herbs.
- Test Your Soil’s pH:
- You can buy a simple soil test kit from a garden store or online.
- Most plants prefer soil that’s slightly acidic to neutral (pH 6.0–7.0). If your soil is too acidic or too alkaline, you can adjust it with natural amendments like lime (to raise pH) or sulfur (to lower pH).
- Improve Your Soil:
- Add compost or organic matter (like leaves, grass clippings, or kitchen scraps) to make your soil healthier and more fertile.
- Mulch around your plants to keep the soil moist and protect it from drying out.
By understanding your soil and making small improvements, you’ll create the perfect foundation for your food forest to thrive.
Testing your soil’s pH and nutrient levels is essential to determine which plants will thrive in your specific location. For example:
- Sandy Soils: These drain quickly and are ideal for plants like lavender, rosemary, and other Mediterranean herbs.
- Clay-Rich Soils: These retain moisture and are better suited for plants like comfrey, elderberries, and pawpaws.
- Loamy Soils: These are the most versatile and can support a wide variety of plants, from fruit trees to vegetables and herbs.
Step 2: Plan Your Water Source
Water is a critical element in the success of any food forest. Proper water management ensures that your plants thrive while minimizing waste and reliance on external water sources. By planning your water source, improving soil moisture retention, and preparing for droughts, you can create a resilient and self-sustaining system.

Water Management
The first step is to identify and secure a reliable water source for your food forest. Depending on your location and resources, you may have access to one or more of the following:
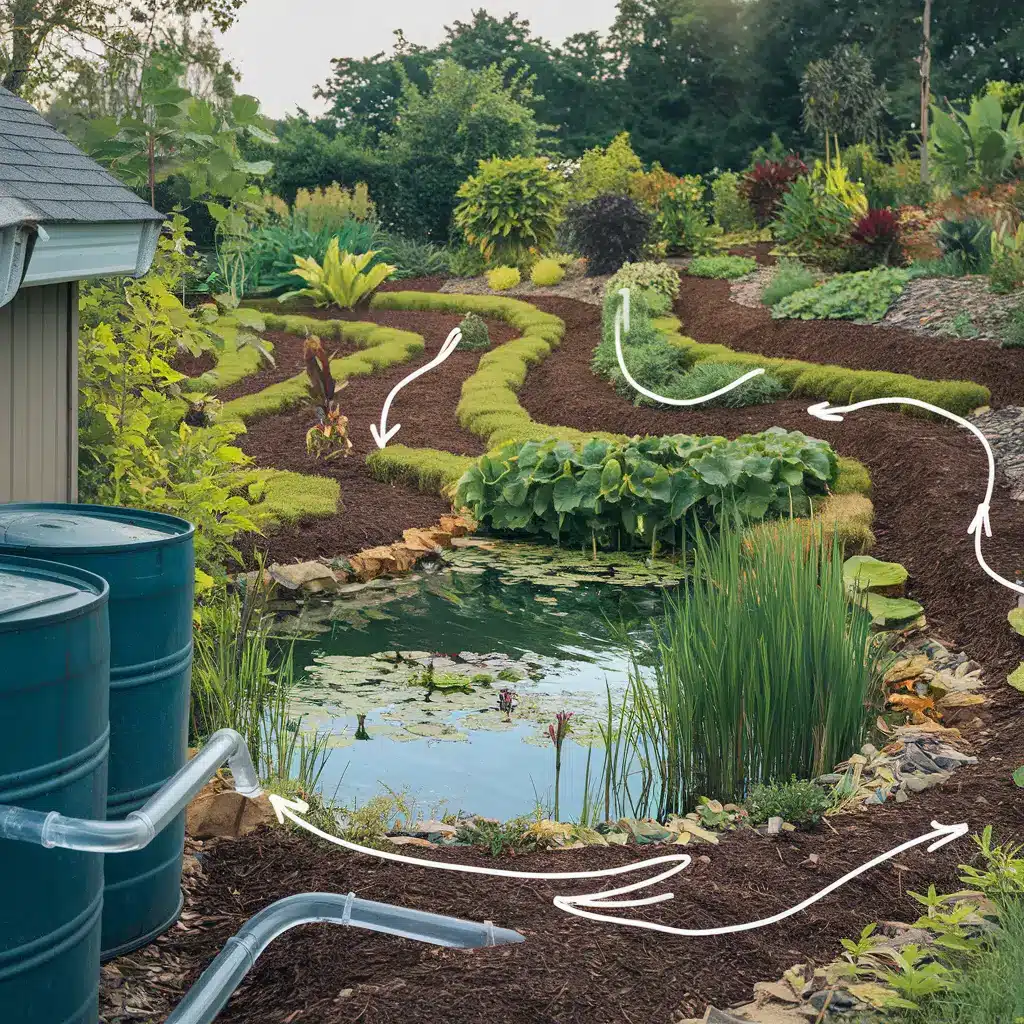
- Rainwater Collection: Harvesting rainwater is an eco-friendly and cost-effective way to supply your food forest. Install rain barrels or tanks to collect water from rooftops, greenhouses, or other structures. Ensure that your collection system includes filters to remove debris and contaminants.
- Natural Water Sources: If your property has a pond, creek, or other natural water source, consider how you can integrate it into your food forest. For example, you can use gravity-fed irrigation systems or pumps to distribute water.
- Hoses or Irrigation Systems: For smaller food forests, a simple hose or drip irrigation system can be sufficient. Drip irrigation is particularly efficient, as it delivers water directly to the roots of plants, reducing evaporation and runoff.
When planning your water source, think about how to distribute water evenly across your food forest. Swales (shallow trenches on contour) are a popular permaculture technique for capturing and directing rainwater to where it’s needed most.
Soil Moisture Retention
One of the most effective ways to reduce your food forest’s water needs is to focus on retaining soil moisture. Healthy, moisture-rich soil not only supports plant growth but also reduces the frequency of watering.
- Mulching: Apply a thick layer of organic mulch, such as wood chips, straw, or leaves, around your plants. Mulch helps to insulate the soil, reduce evaporation, and suppress weeds that compete for water.
- Plant Selection: Group plants with similar water needs together to make irrigation more efficient. For example, drought-tolerant plants can be placed in drier areas, while water-loving plants can be positioned near swales or other water-retaining features.
- Soil Health: Improve your soil’s ability to retain moisture by adding organic matter, such as compost or well-rotted manure. Healthy soil with high organic content acts like a sponge, holding water for longer periods.
Drought Preparedness
Even in regions with regular rainfall, it’s important to prepare for dry seasons or unexpected droughts. A well-designed food forest can withstand periods of low water availability with minimal stress on plants.
- Water Storage: Ensure that your rainwater collection system has enough capacity to store water for dry periods. Larger tanks or multiple barrels can provide a buffer during droughts.
- Deep Root Systems: Include plants with deep root systems, such as trees and perennials, which can access water stored deeper in the soil. These plants are more resilient to drought conditions.
- Efficient Watering: During dry spells, prioritize watering young or newly planted trees and shrubs, as they are less established and more vulnerable to water stress. Use targeted watering methods, such as drip irrigation or soaker hoses, to minimize waste.
- Shade and Windbreaks: Planting taller trees or shrubs as windbreaks can reduce evaporation by shielding smaller plants from drying winds. Similarly, shade from the canopy layer can help keep the soil cooler and retain moisture.
By carefully planning your water source, improving soil moisture retention, and preparing for droughts, you can create a food forest that is both water-efficient and resilient. These strategies not only conserve resources but also ensure that your plants remain healthy and productive, even in challenging conditions.
Step 3: Design Structures and Layout
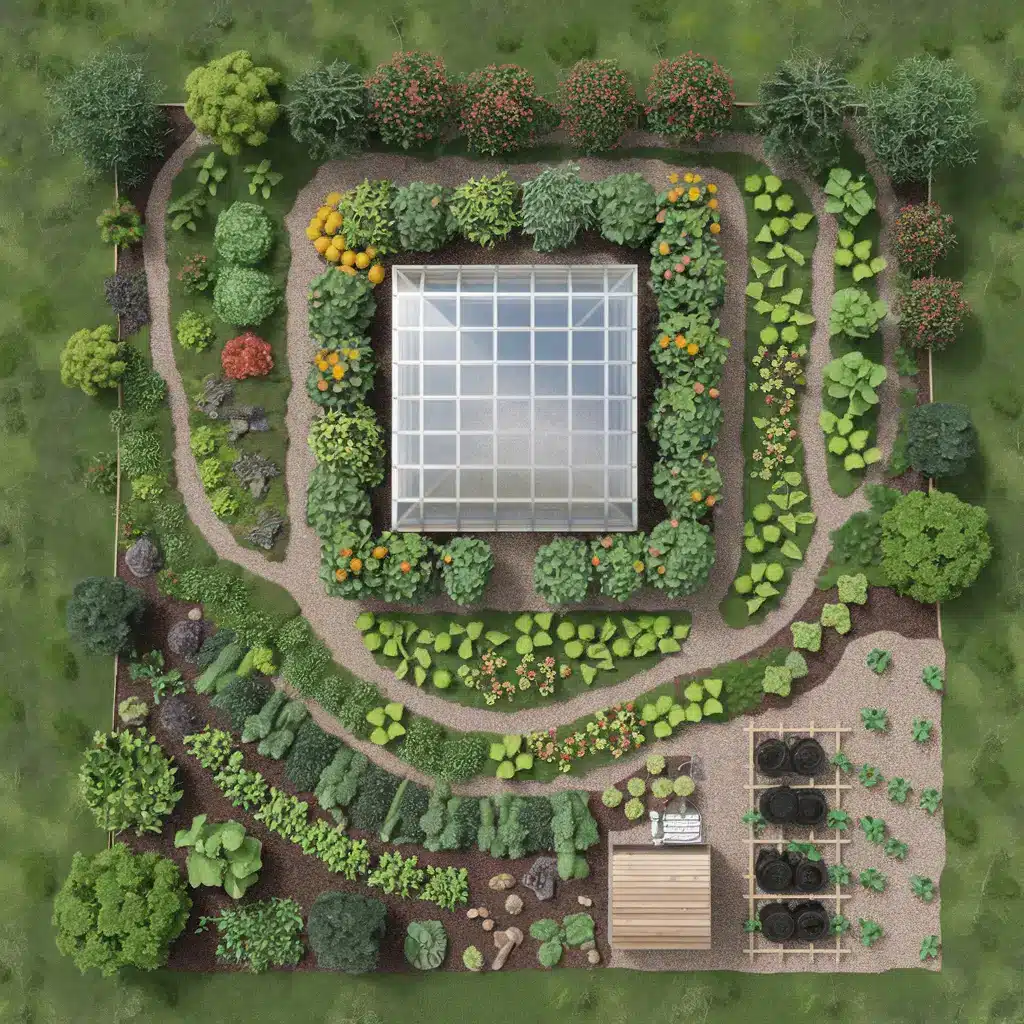

Designing the structures and layout of your food forest is a crucial step in creating a functional and efficient system. Incorporating essential structures and carefully planning their placement will not only enhance the productivity of your food forest but also make it easier to maintain. Structures like greenhouses, sheds, and cold frames can support your plants and provide practical solutions for storage and protection.
Essential Structures
Depending on the size and purpose of your food forest, you may need to include a variety of structures to support your gardening efforts. Here are some of the most common and useful structures:
- Greenhouses: A greenhouse is an excellent addition to any food forest. It allows you to extend the growing season, start plants early, and grow species that may not thrive outdoors in your climate. Greenhouses can also serve as a rainwater collection point by installing gutters and storage tanks.
- Barns or Sheds: These structures provide a convenient space to store tools, gardening supplies, and compost. If you plan to integrate animals like chickens or bees into your food forest, a barn or shed can also serve as their shelter.
- Cold Frames: Cold frames are smaller, low-cost structures that protect plants from frost and extend the growing season. They are particularly useful for starting seedlings or growing hardy vegetables during colder months.
Each of these structures plays a specific role in supporting your food forest, whether by improving plant growth, providing storage, or protecting plants from harsh weather conditions.
Placement Tips
The placement of structures within your food forest is just as important as the structures themselves. Thoughtful positioning ensures that each structure serves its purpose effectively while integrating seamlessly into the overall design.
- Maximize Utility: Position structures like greenhouses and cold frames in areas that receive ample sunlight, as this is essential for plant growth. Additionally, consider using greenhouses as part of your water management system by collecting rainwater from their roofs.
- Accessibility: Place barns, sheds, and other storage structures in easily accessible locations. This will save time and effort when you need to retrieve tools, compost, or other supplies.
- Proximity to Water Sources: Ensure that structures requiring water, such as greenhouses or animal shelters, are located near your water source. This reduces the effort needed to irrigate plants or provide water for animals.
- Sunlight and Shade: Be mindful of how structures may cast shade on your plants. For example, position taller structures like sheds or barns on the northern edge of your food forest (in the Northern Hemisphere) to avoid blocking sunlight from reaching smaller plants.
By carefully planning the placement of these structures, you can create a food forest that is both efficient and easy to manage. Each structure should complement the natural flow of your garden, enhancing its productivity while minimizing unnecessary work. Thoughtful design at this stage will ensure that your food forest is not only functional but also a joy to maintain.
Step 4: Always Be Propagating (ABP)
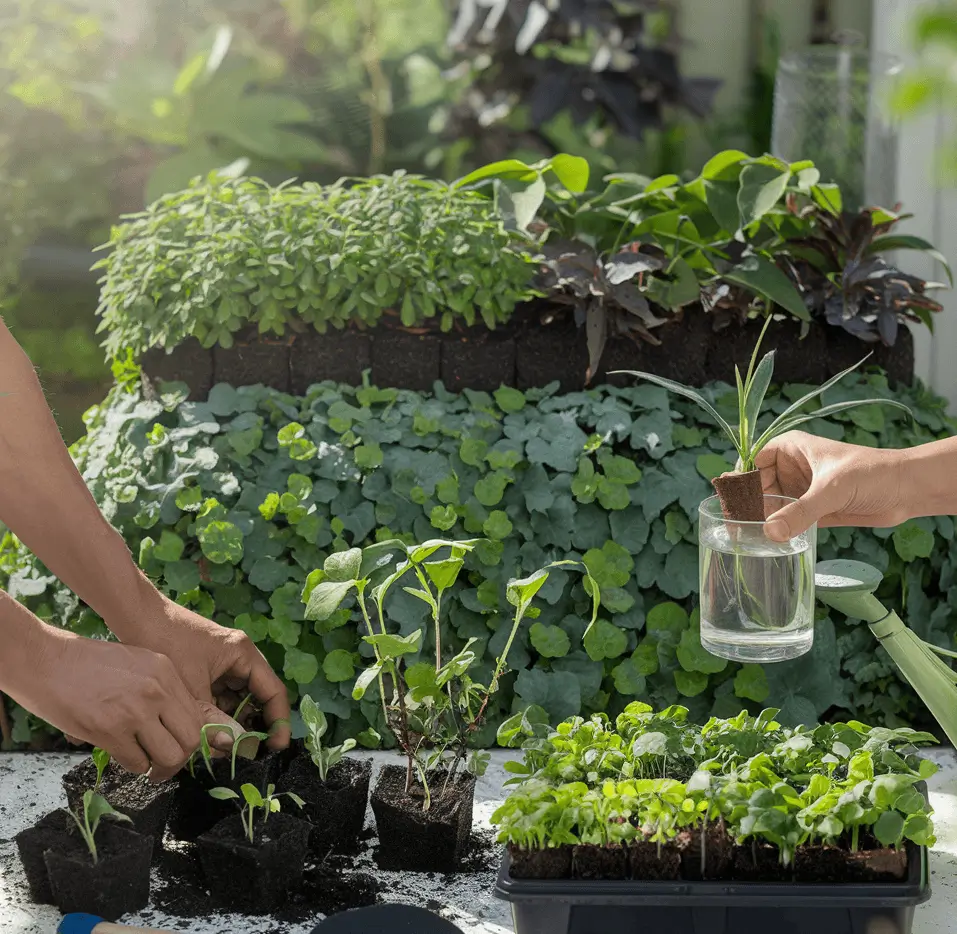

A Propagation is a cost-effective way to expand your food forest. Start with easy methods like growing plants from cuttings or collecting seeds from your environment. For example:
• Take cuttings from herbs like mint or rosemary and root them in water.
• Collect seeds from fruits and vegetables you already grow or purchase.
By continuously propagating plantsBy continuously propagating plants, you’ll ensure a steady supply of new additions to your food forest, keeping it diverse and resilient. Use the right pots and tools to propagate plants effectively and expand your food forest.
Cost Considerations
Building a food forest can be done on a budget with careful planning. Here are some tips to minimize costs:
• Start small and expand gradually to avoid large upfront expenses.
• Use free or low-cost resources, such as seeds from your kitchen or cuttings from friends and neighbors.
• Repurpose materials for structures like trellises or raised beds.
• Look for community programs or grants that support sustainable gardening projects.
The Layers of a Food Forest
A food forest is built on the principle of mimicking the natural structure of a forest, which is one of the most efficient and self-sustaining ecosystems on Earth. This structure is composed of seven distinct layers, each playing a unique role in creating a balanced, productive, and resilient system. By incorporating these layers into your food forest, you can maximize space, encourage biodiversity, and establish a thriving ecosystem that supports both plants and wildlife.
1. Canopy Layer
The canopy layer consists of tall, fruit- or nut-bearing trees that form the uppermost layer of the food forest. These trees provide shade, structure, and protection for the layers below.
- Examples: Apple, pear, walnut, pecan, or chestnut trees.
- Function: The canopy layer moderates temperature, reduces wind, and creates microclimates that benefit the plants below. It also produces a significant portion of the food in the forest.
2. Understory Layer
Beneath the canopy lies the understory layer, made up of smaller trees or dwarf varieties of fruit trees. These trees thrive in partial shade and fill the gaps between the larger canopy trees.
- Examples: Dwarf apple, peach, or citrus trees; hazelnut trees.
- Function: The understory layer increases productivity by utilizing the space below the canopy and provides additional food and habitat for wildlife.
3. Shrub Layer
The shrub layer consists of mid-sized plants, such as berry bushes, that grow between the trees. This layer is highly productive and easy to harvest.
- Examples: Blueberries, raspberries, blackberries, currants, and elderberries.
- Function: Shrubs provide fruit, attract pollinators, and create a transition between the taller trees and the lower layers.
4. Herbaceous Layer
The herbaceous layer includes non-woody plants such as herbs, vegetables, and flowers. These plants grow close to the ground and are often annuals or perennials.
- Examples: Basil, mint, parsley, kale, lettuce, and wildflowers.
- Function: This layer adds diversity, provides food and medicinal plants, and attracts beneficial insects like pollinators and pest predators.
5. Ground Cover Layer
The ground cover layer consists of low-growing plants that spread across the soil, protecting it from erosion and suppressing weeds. These plants also help retain moisture and improve soil health.
- Examples: Clover, strawberries, creeping thyme, and sweet potatoes.
- Function: Ground covers act as a living mulch, conserving water, reducing soil compaction, and fixing nitrogen (in the case of legumes like clover).
6. Root Layer
The root layer includes plants that grow underground, such as root vegetables and tubers. These plants make use of the soil’s deeper layers, accessing nutrients and water that other plants cannot reach.
- Examples: Carrots, potatoes, radishes, garlic, and ginger.
- Function: Root crops provide food while aerating the soil and improving its structure.
7. Vertical Layer
The vertical layer consists of climbing plants and vines that grow upward, using trees, shrubs, or trellises for support. This layer makes efficient use of vertical space and adds another dimension to the food forest.
- Examples: Grapes, beans, peas, passionfruit, and kiwi.
- Function: Vines produce food while maximizing space and creating shade for the layers below.
How These Layers Work Together
The seven layers of a food forest are designed to work in harmony, creating a balanced and self-sustaining ecosystem. Each layer serves a specific purpose, and together they form a system that mimics the natural relationships found in forests.
- Efficient Use of Space: By stacking plants vertically, a food forest maximizes productivity in a given area, making it possible to grow more food in less space.
- Biodiversity: The variety of plants in different layers attracts a wide range of pollinators, beneficial insects, and wildlife, which help maintain ecological balance.
- Nutrient Cycling: Plants in different layers interact to recycle nutrients. For example, fallen leaves from the canopy layer decompose and enrich the soil, benefiting the lower layers.
- Pest Control: A diverse ecosystem naturally controls pests by attracting predators and creating habitats for beneficial insects.
- Water Conservation: The canopy and ground cover layers reduce evaporation, while deep-rooted plants in the root layer access water stored deep in the soil.
By integrating these layers into your food forest, you create a system that is not only productive but also resilient and sustainable. Each layer contributes to the health of the whole, ensuring that your food forest thrives for years to come.
Benefits of a Food Forest
Food forests offer numerous benefits, including sustainable food production, improved soil health, and support for biodiversity. By mimicking natural ecosystems, they create a low-maintenance environment that conserves water, sequesters carbon, and provides habitats for pollinators and wildlife.
One inspiring story comes from Sarah, a beginner gardener who transformed her small backyard into a thriving food forest. Starting with just a few fruit trees and herbs, she gradually expanded her garden by propagating plants and using recycled materials for structures. Today, her food forest not only provides fresh produce for her family but also serves as a habitat for pollinators and birds.
Another success story is from Mark, who started a community food forest in an urban area. By involving neighbors and local organizations, he created a shared space where people can learn about sustainable gardening and enjoy the fruits of their labor together.
Curtis Hanlon’s Tips for Success
Curtis Hanlon, a seasoned permaculture practitioner and food forest designer, offers valuable insights for anyone embarking on the journey of creating a food forest. Drawing from years of experience, his tips emphasize the importance of starting small, learning from the process, and staying committed to sustainable practices. Here are his key recommendations for success:
1. Start Small and Expand Over Time
One of Curtis Hanlon’s most important pieces of advice is to begin with a manageable area and gradually expand your food forest as you gain experience and confidence.
- Why It Matters: Starting small allows you to focus your time, energy, and resources on a specific area, ensuring that it is well-designed and properly maintained. It also reduces the risk of becoming overwhelmed by the scale of the project.
- How to Apply It:
- Choose a small section of your property to begin with, such as a corner of your yard or a single planting bed.
- Focus on establishing a few key layers, such as a canopy tree, a shrub, and some ground cover plants.
- Once the initial area is thriving, expand gradually by adding new plants and layers to adjacent areas.
This incremental approach ensures that your food forest grows sustainably and remains manageable throughout the process.
2. Document Your Progress and Learn from Mistakes
Curtis emphasizes the importance of keeping detailed records of your food forest journey. Documenting your progress helps you track what works, what doesn’t, and how your system evolves over time.
- Why It Matters: Mistakes are inevitable, especially when experimenting with new plants and techniques. By documenting your experiences, you can learn from them and make informed adjustments to improve your food forest.
- How to Apply It:
- Keep a journal or digital log to record key details, such as planting dates, plant varieties, soil amendments, and weather conditions.
- Take photos regularly to visually track the growth and changes in your food forest.
- Note any challenges you encounter, such as pest issues or plant failures, and document the solutions you try.
This practice not only helps you refine your approach but also serves as a valuable resource for future projects or for sharing your knowledge with others.
3. Focus on Organic and Sustainable Practices
A core principle of Curtis Hanlon’s philosophy is to prioritize organic and sustainable methods in every aspect of food forest design and maintenance.
- Why It Matters: Organic and sustainable practices ensure that your food forest works in harmony with nature, promoting long-term health for both the ecosystem and the people who benefit from it.
- How to Apply It:
- Avoid synthetic fertilizers, pesticides, and herbicides. Instead, rely on natural solutions like compost, mulch, and companion planting.
- Incorporate permaculture principles, such as working with nature, conserving resources, and fostering biodiversity.
- Use renewable resources, such as rainwater collection systems and locally sourced organic materials, to reduce your environmental impact.
By committing to organic and sustainable practices, you’ll create a food forest that is not only productive but also environmentally responsible and regenerative.
Conclusion
Building a food forest is a rewarding journey that combines thoughtful planning, sustainable practices, and a deep connection with nature. By following these simplified steps and considering your regional context, you can create a thriving, self-sustaining ecosystem that provides food, supports biodiversity, and benefits the environment.
Start small, experiment with different plants, and expand gradually over time. The beauty of a food forest lies in its adaptability and scalability, making it accessible to gardeners of all experience levels. By starting your own food forest, you’re not just growing a garden—you’re cultivating a legacy of sustainability and abundance for future generations.
To connect with like-minded individuals and gain additional support, join the Facebook community ‘LoveMyPlant‘ This group is a great resource for sharing experiences, asking questions, and finding inspiration from fellow food forest enthusiasts.

It is in reality a great and useful piece of information. I am happy that you shared this useful information with us. Please stay us informed like this. Thanks for sharing.
I’m thrilled you found the information valuable and will absolutely keep sharing insights to help you (and fellow plant lovers!) thrive.